06 Jan 2016
by Amy Huebner Health Coach
in Recipes
Tags: bone broth, broth, candida diet, candida fighting foods, easy recipe, fermented foods, food for winter health, ginger, greens, immune support, lacto-fermentation, lemons, m, Maitake, miso, mushrooms, one bowl meal, organic food, organic meal, quick meal, shiitake, soup, super foods, unsweetened Fire Cider
Winter is finally upon us in the Berkshires. Now is the time to take some preventative measures to insure a healthy winter. There are many ways to incorporate health building foods into a home cooked meal. Here are my top five, must eat foods for winter health and the best part is that combined, they make a delightful, one bowl meal.

- Bone broth + harmony
If you add one thing to your winter routine, start drinking a hot cup of bone broth. Why? Because it’s a collagen building, infection fighting, inflammation reducing wunder food. Just heat up and get cozy with your favorite mug and you are ready to go. We make our own, but you can also pick up bone broth at your local butcher shop. If you’d like to make your own, I recommend “How To Make Bone Broth” on WellnessMama.com, it’s full of resources. For the amount of broth we get, it’s definitely worth the effort!
- Mushrooms: we all love a fungi!
What goes great with bone broth and keeping your immune system strong and fortified against the winter chill? Mushrooms! Maitake and shiitake are two flavorful varieties that are readily available fresh or dried. Maitake, aka “Hen-of-the-Woods”, is my personal favorite. Add them dried to your broth for extra flavor and an immune boost. A plateful of fresh maitake mushrooms sauteed in butter with a little salt and black pepper is sublime. Add a perfectly fried over easy egg and it’s dinner.
- Get fermented: foods that are good for your gut
Fermented foods introduce good bacteria and balance existing bacteria in your digestive system. Miso is a fermented superfood and it’s nutty umami depth adds the right amount of salty flavor to simple bone broth. Mix it in after the broth has been heated and plated. I’m a fan of Chickpea Miso by South River Miso. Other great for your gut and immune health fermented foods include yogurt, unsweetened Fire Cider and lacto-fermented veggies — Hosta Hill sauerkraut and kimchi are staples at our house.
- Stay warm
Ginger offers anti-inflammatory, antiviral, antifungal and antibacterial properties. A warming spice, you can add it to soups, cookies, hot teas and broth. Grated fresh ginger in hot water with lemon is a soothing way to fight germs and mend a sore throat.
- Get your greens
It’s cold and dark outside so be sure to keep your mind and body bright with daily doses of green veggies. They are full of the vitamins and minerals you need to stay healthy and balanced, so make slow cooked collards or give saag paneer a try. Plate up a quick salad to go with your bowl of broth for a balanced meal of both raw, cooling food and warming, cooked food.
Best of all, you can combine these five super ingredients into one dish in about 15 minutes, with only 5 minutes of active time, for one satisfying meal. For someone who frequently skips lunch, I’ll consider this recipe my new year’s resolution.
Mushroom Miso Broth – 2 servings
Ingredients:
- a small handful (about ⅓ cup) of dried maitake and/or shiitake mushrooms , chopped small, stems removed. Keep in mind they will expand 2-3 times during cooking.
- about 1 teaspoon or so of dried powdered ginger
- two cups or more bone broth, unsalted or lightly salted is best since the miso will add all the salt you will need!.
- shredded napa cabbage or kale, about a ½ cup or less should do.
- Miso to taste – use traditional soy miso or experiment with other flavors.
In a pot combine the dried mushrooms, powdered ginger and bone broth. Add a lid and bring to a boil.
Turn down the heat and simmer on low for 10-15 minutes or until the mushrooms are fully hydrated.
Turn off the heat and add a small handful or less shredded napa cabbage or kale.
When the greens are bright green, serve in two bowls.
Add your favorite miso to each bowl, I like about a tablespoon, or more. Serve with a side of kimchi and enjoy in good health!
25 Nov 2015
by Amy Huebner Health Coach
in Essay On Health
Tags: cardamom, custom tea blends, DIY gifts, easy gifts to make, Fire Cider, food as medicine gifts, ginger, golden milk, healthy drink recipes, honey, make a window herb garden, medicinal tea, organic, raw honey, stevia, tea recipes, turmeric, vegan, vegetarian, window herb garden
I have been driven by the idea that food is medicine since I was a teenager. I had health issues that were difficult to treat using conventional, pharmaceutical-based medicine It became clear to me that when we sit down to eat we have a powerful opportunity to nourish and heal ourselves with the foods we choose. And I have dedicated a significant portion of my life’s work doing that through health coaching, and through our work with Fire Cider. One of my favorite things to do is share the idea of food as medicine with my friends and family especially during this time of giving. Here are my five go-to make-at-home ways to share the gift of food as medicine this holiday season.

Photo from thriftyniftymommy.com
Start A Window Herb Garden
A small window herb garden is easy to assemble and gives the gift of fresh, green herbs all winter long! Nothing brightens up a meal like a confetti of fresh herbs sprinkled on top or an oil infused with herbs picked nearby. For how-to resources on making a kitchen herb garden to gift, I used the post, “Tips for a Small-Space Kitchen Herb Garden” on thekitchn.com and on WikiHow.com “Start A Window Herb Garden” as resources.
Don’t have a green thumb? You can purchase ready-to-pick, plants at your local greenhouse, farm store or grocer. I like Basil, Parsley, Cilantro and Rosemary but pick what your recipient will use the most. Add handmade tags with simple care instructions and a couple of your favorite recipes to complete the gift.
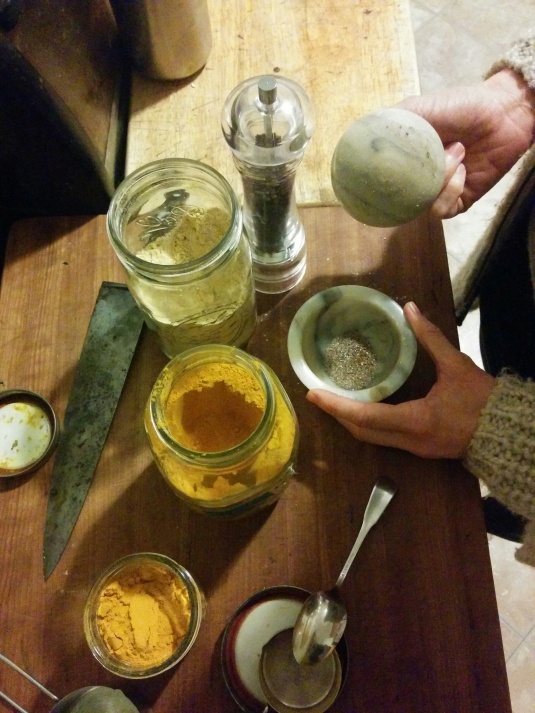
Grinding cardamom for the spice mix.
Make A Healthy Drink Mix
I love drinking sweet and spicy golden milk, especially in the winter when I can really use the benefits of turmeric. You can read more about “Golden Milk – A Calming Ayurvedic Health Drink” on the FireCider.com blog. This year, I’ll be giving out jam jars filled with my pre-mixed golden milk spice blend, milk not included!
Golden Milk Spice Mix to fill on 8 oz jam jar:
¼ cup dried powdered ginger
½ cup dried powdered turmeric
1 teaspoon ground cardamom
¾ teaspoon ground black peppercorns
Put everything in a 1 cup jam jar, seal and shake to combine! Decorate the jar, add an ingredient label and include a short and sweet recipe for Golden Milk:
For every 8 ounces of milk (whole dairy or coconut) use one teaspoon of Golden Milk Spice Mix. Whisk to combine and bring to a simmer for two minutes.
Add raw honey (or stevia/sweetner of your choice) to taste.
I ordered all of the above organic ingredients from Starwest Botanicals but you can also find them in the bulk section of your local co-op or grocery store.
Give a Farm Share or Produce Delivery
Give the gift of nutritious, whole foods week after week! Find a CSA— Community Supported Agriculture or a store that has a weekly delivery service like Berkshire Organics in Dalton, MA.
For a list of CSA’s across the US, LocalHarvest.org is an excellent resurce.
Custom Teas for Health
“Tea began as a medicine and grew into a beverage.” —Okakura Kakuzō
Photo by Briar from her Marble and Milkweed Etsy Shop
Winter is the season for tea so why not give the gift of delicious, medicinal tea for winter health? Make your own blends of tea using dried plants from your garden, local farm or bulk organic herbs and spices from Starwest Botanicals. I found a long list of tea recipes on adelightfulhome.com under the post, “52 DIY Herbal Tea Recipes” Package your tea in ball jars and add a tag with the ingredient list and steeping instructions.
Learn Together
Don’t feel crafty? Not sure what to make? Sign yourself and a friend up for a class and learn how to make something together! The gift of an experience, especially one that’s shared, is sometimes the best gift. Learn how to make your own bone broth, herbal tinctures, Thai food, etc by checking out classes near you—start with local farms, chefs and herbalists and see what’s happening in your town.
28 Jul 2015
by Amy Huebner Health Coach
in Recipes
Tags: B.L.T., Bibb lettuce, burgers, candida, candida cookbook, candida diet, candida friendly, candidiasis, collard greens, collard wrap, collards, easy meal, gluten free wrap, greens, health coach, healthy meal, lettuce leaves, one dish meal, organic, paleo, quick meal, raw, Romaine lettuce, salad, snack, vegan, vegetarian, veggie wrap
One of my favorite ways to eat more greens is to use them in place of bread or crackers. Nothing against burger buns or sandwich bread but you can skip the processed wheat and grab a bunch of crispy Romaine or collard greens instead. I use Romaine lettuce like a taco shell- fill it up with whatever you like- sliced avocado, tomato, homemade mayo and bacon for a healthier B.L.T. Bibb lettuce is soft, flexible and makes for a great little wrap. Want to eat that salad with your hands? Wrap it up in the biggest lettuce leaves from the outside of the bunch. Look at you, doubling down on your veggies!
Using large collard leaves makes for a sturdier wrap that can hold such awesome summer foods as cheese burgers or the ultimate sunny seed hummus wrap. You can use the leaves raw or lightly steamed — these are best for hot foods or for bigger wraps. The folding is easy and unlike regular wraps, these stay sealed. The only prep work you need to do is to carefully trim them rough stems.
Cut the end of the stem off and then lay the collard leaf flat and slice off the rough stem that sticks up, so that the leaf is flat and entirely flexible, like in this photo from MindBodyGreen.com’s tutorial on how to use collards like a wrap!

Don’t worry if you tear the collard leaf a bit, you’ll get the hang of the stem trimming and can fold around any small tear.
If you want to steam your collard leaves so that they are more flexible and easier to use and eat, there are a few methods that work well. This video from Plant Powered Kitchen.com has my favorite technique for when you just want to make up a few wraps. Get some water boiling in your kettle and open the spout so you’ve got a nice stream of steam coming up. Hold your raw collard leaf by the stem and wave it over the spout of steam, lightly steaming the whole leaf until it’s bight green and soft enough to fold. Then trim off the stem as described above. Repeat until you have enough wraps.
Or, follow the quick blanch method I found on Mind Body Green.com– bring a wide shallow pan of water to a simmer. Take your de-stemmed collard leaves and give them a 10 second dunk in the pan, one at a time, using tongs to get the collard leaves in and then out and into an ice bath. Dry in layers using tea towels. Once you’ve got all your wraps ready, fill as desired!
The wrapping part is easy, and there are a number of ways to do it, but this photo tutorial from Honest Fare.com is easy to follow:

Add your filling to the center of one or two overlapping leaves. Fold the sides in to contain the filling. Then, starting at one long end, roll the leaf over the filling and keep rolling, making sure the ends stay tucked in. Slice in half and enjoy!
 Above, a collard wrapped Bareburger – it’s as good as it looks!
10 Apr 2015
by Amy Huebner Health Coach
in Candida, Detoxing, Supplements
Tags: Bentonite clay, candida, candida cookbook, candida diet, candidiasis, caprylic acid, coconut oil, colon cleanse, D.E., daily detox, detox, detox drink, Diatomaceous Earth, food grade diatomaceous earth, health coach, organic, psyllium, psyllium husk powder, vegetarian
Spring is finally here and if you dug yourself into a health hole this winter, don’t worry, you are not alone! This ‘recipe’ is for a simple, daily detox you can drink first thing in the morning to help give your whole digestive system a fresh start. I’ve been drinking this every morning for two months now and I think you might want to try it too! The main ingredient? It’s dirt! Not just any dirt, for this healthy dietary supplement you want to get food grade diatomaceous earth. You may have seen the non food grade stuff for sale at a garden center or hardware store. There are a lot of ways to use D.E. around the house, garden and even on your pets.
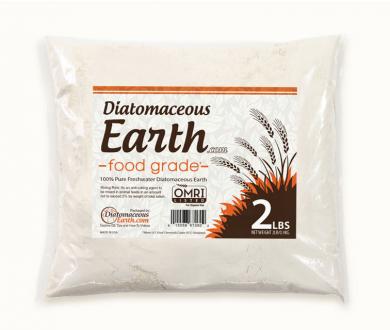
I want to focus on the long list of health benefits associated with drinking a teaspoon to a tablespoon of food grade diatomaceous earth daily, mixed in water or juice. According to DiatomaceousEarth.com: “Food grade DE contains about 14 trace minerals. “Trace” means up to 1 percent, so each of the trace minerals are present in that amount. This means that food grade diatomaceous earth is largely made up of amorphous silica, which comprises about 85 percent of food grade diatomaceous earth. There is some research that suggests possible health benefits from silica. The health benefits listed below are ones reported by other people who have used DE in their diet:
- – better digestive health
- – more regular bowel movements
- – detoxifies
- – healthier colon
- – reduced cholesterol
- – better food absorption
- – better night’s sleep
- – clearer skin
- – stronger teeth and gums
- – healthier hair and nails
- – less joint and ligament pain
- – helps arthritis
- – less sickness
- – more energy
- – soothes burns
- – insect bites
- – clears skin rashes
- – less acne
- – possible antiparasitic
- – could lower Candida levels”
I decided to give this a try when I learned it could help with Candida, on top of all those other nice side effects. I started with a teaspoon and slowly worked my way up to a heaping tablespoon per day in water first thing in the morning. I had some detox symptoms (headache, feverish, nausea) in the afternoon and evening of the first day, but was able to avoid more symptoms by very slowing increasing my dose over several days. Not everyone experiences detox symptoms, I had a hunch that I would since I have digestive Candida issues. I have noticed that my digestion is better, I get less of a reaction to foods containing carbohydrates and sugars, fewer Candida symptoms overall and yes, my nails are stronger, my skin is clear and my knees are not complaining about running outside again!
From left to right: powdered psyllim husks, coconut oil, diatomaceous earth and liquid bentonite clay.

So, you know what it can do for you, but how does Diatomaceous Earth work in your digestive system? Here’s a quick explanation from EarthWorksHealth.com:
“Diatomaceous Earth is quite hard. On the hardness scale where diamonds are a 9, Diatomaceous Earth is a 7. This is very important because as those millions of tiny, hard and sharp Diatomaceous Earth cylinders pass through the small and large intestines, they “scrub” the walls. After only a few months of taking Diatomaceous Earth, the intestine wall is no longer coated with mucus and molds but CLEAN!!”
Want to try drinking dirt? Mix a teaspoon or less into 8 or more ounces of water or juice first thing in the morning. D.E. has no taste, so it’s easy to drink. Try it for a few weeks and see how you feel. I like to add a teaspoon of powdered psyllium husks and a tablespoon of bentoite clay to the mix for the first week to help clean my digestive system and pull out toxins. If you add the psyllium, make sure to drink more water or hot tea (8 oz or more) afterwards to give the psyllium enough water to absorb. You can buy D.E. from the Pittsfield Health Food Center on North St. where they also sell bentonite clay and psyllium husk powder, or order online from DiatomaceousEarth.com
I like to add coconut oil to hot tea and drink that following the clay, D.E., psyllium mixture since coconut oil has lots of caprylic acid in it, great for combating excess Candida.
20 Mar 2015
by Amy Huebner Health Coach
in Candida, Supplements
Tags: anti fungal foods, anti fungal supplements, apple cider vinegar, candida, Candida Albicans, candida cookbook, candida diet, Candida Overgrowth, caprylic acid, coconut oil, Fire Cider, food as medicine, garlic, ginger, green veggies, greens, health coach, onion, organic, pau d'arco, raw tonic, unsweetened, vegan tonic, vegetarian
Candida Overgrowth is something that you may have been hearing more about lately, or maybe you’re like me, and have had a personal experience with too much Candida. Candida Albicans is a naturally occurring type of beneficial yeast found in every body’s mucus membranes. Under certain conditions the Candida mutates into a fungal form. This fungal Candida grows roots and can penetrate the walls of your intestines or other areas of the body causing all kinds of symptoms. Unfortunately, the conditions that can cause Candida to multiply in it’s damaging fungal form are all part of a typical American lifestyle: use of synthetic hormone based birth control, antibiotic consumption/use, too much stress, not enough movement and deep breathing, a diet high in processed sugars, alcohol and/or carbohydrates and the consumption of processed foods and body products loaded with chemicals, hormone disruptors and antibiotics.

The symptoms of Candida Overgrowth are many but here are the highlights: sugar cravings, bloated abdomen, gas and digestive pain, especially after consuming carbohydrates or sugary foods, IBS, weight gain, joint pain, feeling sluggish or tired, brain fog, itchy skin, chronic vaginal yeast infections, bladder infections, jock itch and/or thrush which usually means a white or yellowish coating on the tongue. Not everyone has all the symptoms and Candida Overgrowth can overlap with other imbalances. It’s best to get tested and properly diagnosed before treating yourself for any health issue. The test for Candida Overgrowth should include an in depth medical history and a lab test on saliva, blood and stool samples.

The good news is that the way to get Candida back into balance is all about using the food you eat everyday as medicine, no drugs or prescriptions necessary! My blog, The Candida Diaries, is dedicated to sharing delicious recipes and remedies so that you can eat your way back to health. The Candida diet is actually pretty simple and similar to the Paleo or Atkins diets: no sugars, no carbohydrates, yes to lots of green veggies, fresh herbs, organic proteins and fats, nuts and seeds and naturally fermented foods like sauerkraut, crème fraiche and raw apple cider vinegar. These fermented foods help to repopulate your digestive system with beneficial organisms that help support a healthy internal balance.
When I was first diagnosed, I worked with my doctor to come up with a list of supplements, herbs and medicinal foods to help me recover. I started by complimenting a no sugar, no carbohydrate diet with a lot of immune support. I took high does of Vitamin C with Quercetin as well as Osha, Ecchinacea and started eating more fresh green herbs, bone broth, raw sauerkraut and aloe vera juice. After I was on the diet for a few weeks, eating well and supporting my immune system, I added in antifungal foods and supplements: raw garlic, oil of oregano, pau d’acro tea or tincture, chaparral tincture, digestive enzymes and caprylic acid aka coconut oil. There are many anti fungal, anti viral and anti bacterial plants out there so you can easily rotate your foods and herbs for maximum effect and support.
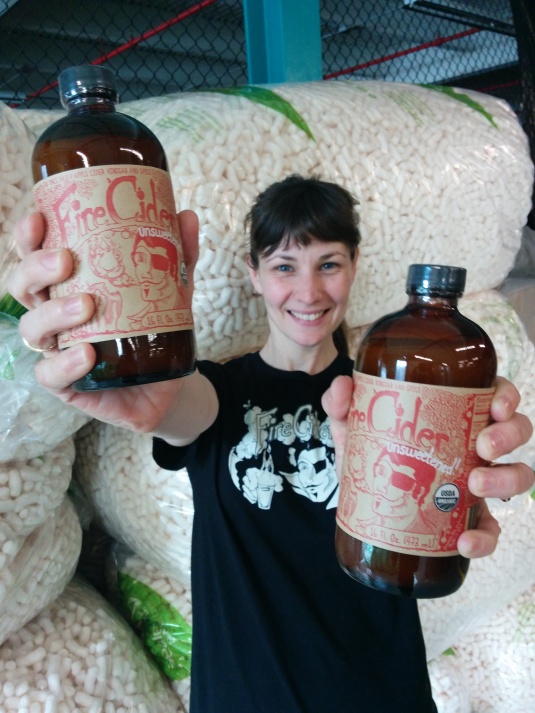
Me with Unsweetened Fire Cider in front of a wall of food starch packing peanuts (yes, they are biodegradable!)
In 2009 my husband Dana introduced me to a vinegar and honey based health tonic that he had been making for his seasonal bouts of allergies and bronchitis for the past 10 years. Without adding the honey in at the end, this tonic is a mix of a lot of the foods I had been eating for their anti-fungal, anti-bacterial and immune boosting properties: organic, raw apple cider vinegar, citrus, onions, garlic, ginger, turmeric, horseradish and habanero peppers. I used Dana’s tonic, now known as Shire City Herbals Fire Cider® and also called master tonic, plague tonic, etc, as a digestive aid after meals to reduce excess Candida, gas and bloating. It also helped me to avoid getting sick all the time during the winter. Unsweeteend Fire Cider was a life changing experience and I have been using it daily ever since to keep my Candida in balance and my immune system supported. In 2011 my husband, brother and I decided to start Shire City Herbals so we could make Fire Cider on a large scale and share this traditional remedy with as many people as possible.
I have also found a lot of non food things to support my health, like loving what I do for a living! A regular yoga practice, deep breathing, getting exercise outside, these activities keep me grounded and help me manage stress. Keeping a food journal and working with a naturopath have been tremendously helpful. A holistic approach to health and wellness is one that recognizes that everything is connected, you food, your environment, your relationships, your job, everything! Using your food as medicine is a great way to start reconnecting with your healthiest self.
05 Mar 2015
by Amy Huebner Health Coach
in Essay On Health
Tags: Ashram, Berkshires, Inner Quest Intensive, IQI, Kripalu, Kripalu Board of Trustees, Kripalu Seva Program, kripalu yoga, Kripalu Yoga Center, Kriplau, seva, Yoga Retreat
Last week a friend and former Kripalu volunteer informed me that the Volunteer Program at Kripalu, called Seva, had been eliminated. A search turned up nothing more than this grammatically incorrect sentence on the Kripalu website: “We recognize and honor, respect, and thank all of those who devoted their time in selfless service to Kripalu and its mission over the last 30 years.” Above which it states they are no longer accepting applications. Then I learned that the Inner Quest Intensive, Kripalu’s longest running, signature program, was also canceled. There are many reasons why I feel this change as a huge loss, not just personally, but for our community as well. Most importantly, without the opportunity to volunteer, Kripalu is now unwelcoming to those who can’t a afford a $100 day pass, let alone a program. This cuts Kripalu off from part of its community and makes it seem like just another exclusive yoga resort. I implore the Kripalu Board of Trustees to reconsider this decision.
I love Kripalu. I have referred to the place as my spiritual home and count myself lucky to live so close that I can pop over for dinner on a Wednesday with my BKC membership! Years ago I received a scholarship to attend the Inner Quest Intensive (IQI), which is, as the name suggests, really intense. It was the most challenging and useful program of self-development I have ever taken and holy wow did it change my life. Until recently, it was the longest running, most significant program Kripalu has offered. To many of us former volunteers and co-workers, ending all volunteer opportunities and the IQI as well, looks like the last of what began as an ashram has been discarded and the transformation is complete: The Kripalu campus has become a world-class yoga retreat for those who can afford such luxuries. Without Seva, which is the counterpoint to luxury, there’s no longer a community in residence dedicated to walking the talk and living the yoga. One sentiment echoed by many: Kripalu has no prana left. Shakti has left the sanctuary. This is a profound and palpable loss. I am writing this to ask the board of directors to bring these foundational programs back! And, if not, then what will they do in place of these programs, to keep Kripalu accessible to everyone?
The Volunteer Program is what made Kripalu, a non-profit, and its community unique. Seva means service. For the past 30 years anyone could apply to this free exchange program, acceptance was based on merit. Every volunteer made a commitment of time and service to Kripalu and in return received room and board and a place in the yoga centered Seva program. Seva is what made Kripalu yoga open to everyone. Folks came from all over the globe, including right here in Berkshire county, to experience the reciprocal gift of living yoga and serving their community.
So why would Kripalu end two of its longest running programs? Programs that had an incredibly profound effect on those who participated in them. Here’s what I learned when I talked with some former volunteers and Kripalu employees, past and present, about Seva: in the past few years there has been a suicide, a sexual assault and too many calls to the cops. There have been too many people joining the Seva program looking for a free ride or a way to escape. I was shocked and saddened by this. What a shame. And what place would want death, assault and the local cops associated with it?
Seva is a privilege and it seems like too many folks signed up to take advantage. Too many people came with the attitude of what can Kripalu do for me, instead of how can I serve? This kind of abuse is clearly unacceptable. Seva volunteers should be setting an example for the rest of community. There must be a way to change what wasn’t working in order to preserve the heart of this program for the rest of us. Why not invest in turning Seva into an optimal version of itself, something to be proud of again? There was a time, in the not too distant past, when the Seva program was in balance and making a contribution to the entire Kripalu community.
What kind of message does it send to eliminate something because it’s not working like it used to? Isn’t Seva the kind of program an institution like Kripalu needs to remain grounded and connected to its mission, its roots and its community? Seva is for everyone! Service is an integral part of yoga, as any student will tell you. Bring the volunteer program back so that Kripalu can continue to be a space for so many people to have life changing experiences doing Seva. Please don’t let a few troubled participants and a few poor decisions take Seva away from everyone. Kripalu has so much to offer– how can we keep it that way?
It seems the recent past has not been a bright one for the Volunteer Program. Perhaps now is the time to share our stories about how Seva and/or the Inner Quest Intensive has had a profound positive effect on our lives. Let’s share our love of these two core Kripalu programs with the members of the Kripalu Board of Trustees, asking them to reconsider. In the very least, I think the community needs an explanation of what must have been a very difficult decision. Even if we can not convince the Kripalu Board members to reinstate the Volunteer Program, at least we can give it the commemorative ending it deserves.
If you feel inclined to share your experience, please mail a separate copy to one or all of the following people at the address below:
- David Lipsius, Chief Executive Officer
- Denise Barack, Director of Program Development
- Erin Peck, Senior Vice President of People, Culture, and Programs
- Members of the Board of Trustees
c/o Kripalu Center
PO Box 309
Stockbridge, MA 01262
And share here as well!
13 Feb 2015
by Amy Huebner Health Coach
in Recipes, Supplements
Tags: anti fungal, candida, candida cookbook, candida diet, candidiasis, caprylic acid, coconut oil, health coach, healthy dessert, organic, paleo, raw, raw recipe, shredded coconut, snack, sugar free dessert, vanilla stevia, vegan recipe, vegetarian
This is my new favorite sweet treat. It’s just five organic ingredients and is super simple to put together. This raw, vegan treat is packed with lots of energy from coconut oil and shredded coconut. Did you know that a tablespoon of coconut oil contains 1050 mg of Candida fighting Caprylic acid? Yep, these love bombs are a great way to get plenty of nourishment and an anti-fungal treatment! I added in some other variations at the end. I’m sure there are even more to try. Recipe can be halved or doubled. So get going and make some Coconut Love Bombs to share with the ones you love!

Ingredients for 32:
- 1 Cup Coconut oil – room temperature works best, it should be a little soft, like cream cheese and easy to blend. Liquid oil needs to be cooled in order to work well in this recipe.
- 1 1/2 Cups Unsweetened Coconut flakes
- a few drops of Vanilla Stevia
- Pinch of salt
- 1 teaspoon Vanilla extract (If not using vanilla Stevia)
Method:
- Mix everything together well.
- Use a 1 Tablespoon scoop to shape the dough into little half moons.
- Place on a baking sheet and freeze for about 30 minutes.
- Keep in a sealed container in the refrigerator and serve cold.
Variations:
Substitute 1/2 cup of coconut oil for 1/3-1/2 cup peanut butter or coconut manna. I used Peanut butter and they came out better than Butterfingers!
Add 1 teaspoon Chai spices to the original recipe
After freezing, dip in melted sugar free dark chocolate, freeze again til the chocolate coating is set.
The original recipe sounds good too, I found it on the side of my Nutiva Coconut Oil container:

21 Jan 2015
by Amy Huebner Health Coach
in Recipes
Tags: candida cookbook, candida diet, candidiasis, cheese, Christmas dinner, eggs, green veggies, health coach, leek gratin, leeks, one dish meal, organic, pot luck dinner, pot luck dish, side dish, vegetarian
This is my new favorite way to cook and eat leeks. My Dad made this on a whim, without a recipe, for Christmas dinner and it was amazing, no leftovers at all! You can easily make double this recipe, which is what I did since I had a whole bunch of leeks from my Dad’s garden and wanted to cook them up all at once. I cooked all the leeks, about 10 cups total, and baked half right away. The next day I baked the other half for another dinner. This is a nice addition to a pot luck dinner and if you do have leftovers they are great hot or cold. Prepping the leeks takes the longest, especially if you are getting them from your root cellar and not fresh from the store. Leeks are a great storage veggie, as you can easily peel off the less pretty outer layers and find a perfectly preserve leek inside!

Ingredients:
5 cups sliced leeks, white and light green parts only
Salt and pepper to taste
3 Tablespoons pasture butter
1 large egg
a shy 1/2 cup cream or half and half
Method:
Prepare the leeks: strip away any rotten or damaged outer layrs, slice off the root tip and trim the top to the light green part. Thinly slice all the leeks until you have about 5 cups.

Preheat the oven to 355 degrees.
In a large sauce pan or pot, I used my enamel coated cast iron soup pot, add the butter, sliced leeks and sprinkle with salt, then add as much black pepper as you like.
Over medium low flame, sweat the leeks until they are just past bright green, cooked though and reduced dramatically in size.


Let the leeks cool.
Whip together the egg and heavy cream.
Combine the egg, cream and cooked, cooled, leeks in glass or ceramic baking dish, I used a 1.5 liter pyrex square.
Spead the mixture evenly and top with a sprinkling of cheese, Gruyere is my favorite!

Bake the gratin until it’s set and staring to brown around the edges, about 30 minutes. You can brown the cheese under the broiler at the end if that sounds good to you. Enjoy!
04 Jan 2015
by Amy Huebner Health Coach
in Essay On Health
Tags: Achievable, challenge yourself, goals for success, Happy New Year, Measurable, New Year resolutions, new year's resolutions, Realistic, Relevant, S.M.A.R.T. goals, setting goals, SMART Goals, Specific, Time-bound, Timely
It’s that time of year again when everyone is talking about setting goals or making new resolutions. If you are like so many people who set goals in the New Year only to find them somehow impossible to follow though with, this guide is for you! So many times in my life I have tried changing a bunch of things at once, only to fail at everything.
Setting S.M.A.R.T. goals is a way to set yourself up for success because how you go about setting goals can make all the difference. When I was working as a health coach one of the most important things I would tell my clients is to set just one goal at a time and use the acronym S.M.A.R.T. Goals as a guide.
When you set one goal and focus all of your energy on it, you are much more likely to succeed. This guide is great for small goals and can also help you break down big goals into smaller, more manageable steps. You don’t get to the mountain top in one leap, it takes many small steps to add up to big accomplishments. So what does S.M.A.R.T. stand for?

S is for Specific. Let’s say you want to get more exercise on a regular basis. That’s a great goal but it’s pretty vague. A more specific goal would be: I want to get a minimum of 20 minutes of exercise 5 days a week. Even more specific: I want to run or do yoga at home for a minimum of 20 minutes a day, 5 days a week, Monday through Friday. I will schedule this into my weeks calendar to make sure I have the time. Now that’s specific!
M stands for Measurable. A successful goal is one that can be easily measured and answers the questions How much? How many? Using my specific goal above, I can measure both the frequency and the duration of my workouts. This is how I will know I am hitting my goal or if I need to make some adjustments so that I can hit my goal.
A is for Achievable. Is your goal something that you can, with a little stretching, actually reach? You want to aim for something in between too easy and too challenging. Experiment and see, sometimes a more challenging goal is also more motivating!
R stands for Realistic or Relevant. If you don’t exercise at all, setting a goal of five workouts a week is really not realistic. Scale things back until you can realistically, with some stretching and commitment, reach your goal. Start with 1-2 workouts per week. Once you reach that level of fitness, try for 3-4 per week and so on until you hit your big goal. A relevant goal is one that matters to you that you are both willing and able to work towards achieving it! Beware of setting goals based on “I should…” We can all list 100 things we ‘should’ be doing, things that usually have more to do with others than with our true desires. Make sure your goal is for you, think “I want, I need or I desire” as ways to state your goal.
T is for Timely or Time-Bound. With my exercise goal I would want to set a date at which I will be regularly hitting my goal. Let’s say I pick a deadline of February 1st, giving me a month to sort out all the details and get into this new workout routine. An end date for your goal gives you something to work towards. It gives urgency to your work and a clear deadline for completion. Then you can celebrate your success and set up a new goal!
Each goal you set and achieve will set you up for your next goal. Each one a small step towards a bigger picture: a more fully realized version of who you really are. Think of how quickly each little change you make will add up into major positive changes over the course of a few months or a year.
One last thing, be sure to share your goal and your deadline with people who support you in making positive changes. Knowing your friends are rooting for you, and will be asking you how things are going, can be a huge motivator!
Previous Older Entries


")